Moodle is a user-friendly and open-source learning management platform (LMS) written in PHP, designed to provide administrators, educators, and students with a platform to create and deliver personalized online learning and training courses. It supports a plethora of plug-in themes that allows the admin to customize the site colors, fonts, layout, etc. to suit the local needs.
Paytm’s integration with your Moodle site assists you to accept payments online using Paytm Payment Gateway that facilitates a wider choice of payment options to your customers such as Paytm Wallet, Debit Card, Credit card, Netbanking (supports 3D Secure), and UPI.
Before you begin to integrate the Paytm Payment Gateway on Moodle, make sure you have a registered business account with Paytm. To create the same, refer to the section Generate your API Keys.
Generate your API keys with Paytm
To generate the API Key,
- Log into your Dashboard.
- Select the API Keys under Developers on the left menubar.
- Select the mode for which you want to generate the API Key from the menu.
- Click Generate now to generate a key for the test mode and in case of live mode, first activate the account by submitting documents and then generate the key by clicking the Generate now button.
- You will get the merchant ID and merchant key in response to the above. Please make a note of these to be used further.

Note:
- You have to generate separate API Keys for the test and live modes. No money is deducted from your account in test mode.
- MID and merchant keys generation may take few minutes. In case you do not see these details, please logout and login after 5 minutes. Proceed now to generate these keys.
Moodle with Paytm
This section describes how to integrate your Moodle site with the Paytm Payment Gateway plugin to accept payment from a customer.
Installation and Configuration
To get started,
- Download the compatible Paytm integration plugin zip from here.
- Log into your Moodle platform using the admin credentials.
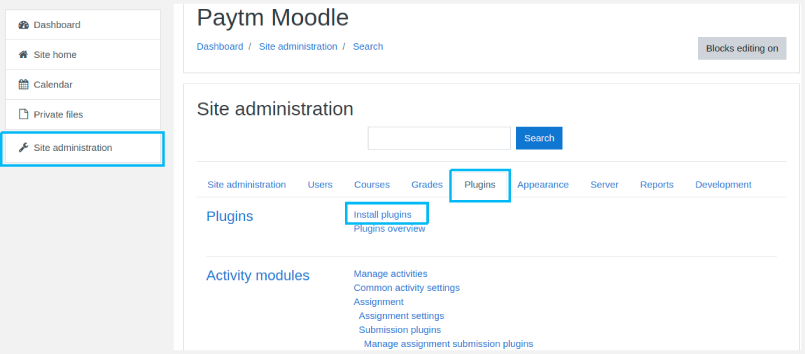
The Moodle Admin Dashboard appears.- On the left navigation bar, go to Site Administrations > Plugins > Install Plugins.

The Plugin Installer screen appears.

- Upload the plugin folder by either using the drag and drop file functionality or the Install plugin from the ZIP file button. It redirects you to the Moodle Admin Dashboard.
You can also unzip the downloaded paytm plugin folder, then copy the "paytm" folder and paste in the moodle root folder "moodle > enrol".
- On the left navigation bar, go to Site Administrations > Plugins > Install Plugins.
- On the left navigation bar, go to Site Administrations > Plugins > Plugin Overview.
- On the Plugin Overview page, click the Additional Plugins tab.
- Click the ⚙︎ icon next to the Enrolment methods header.

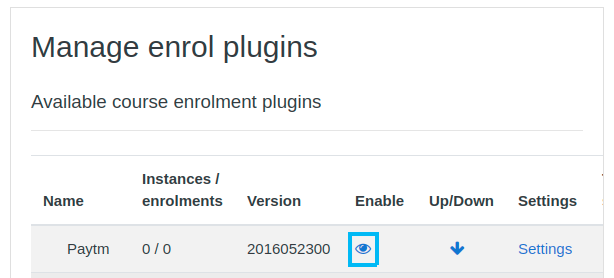
The Manage enrol plugins screen lists the available course enrolment plugins.
- Click the 👁️ icon next to Paytm under the Enable column to enable the Paytm payment plugin.

The availability status of the plugin will change to Enabled on the Additional Plugins screen under the Availability column. - You can set up the merchant account by clicking Settings.
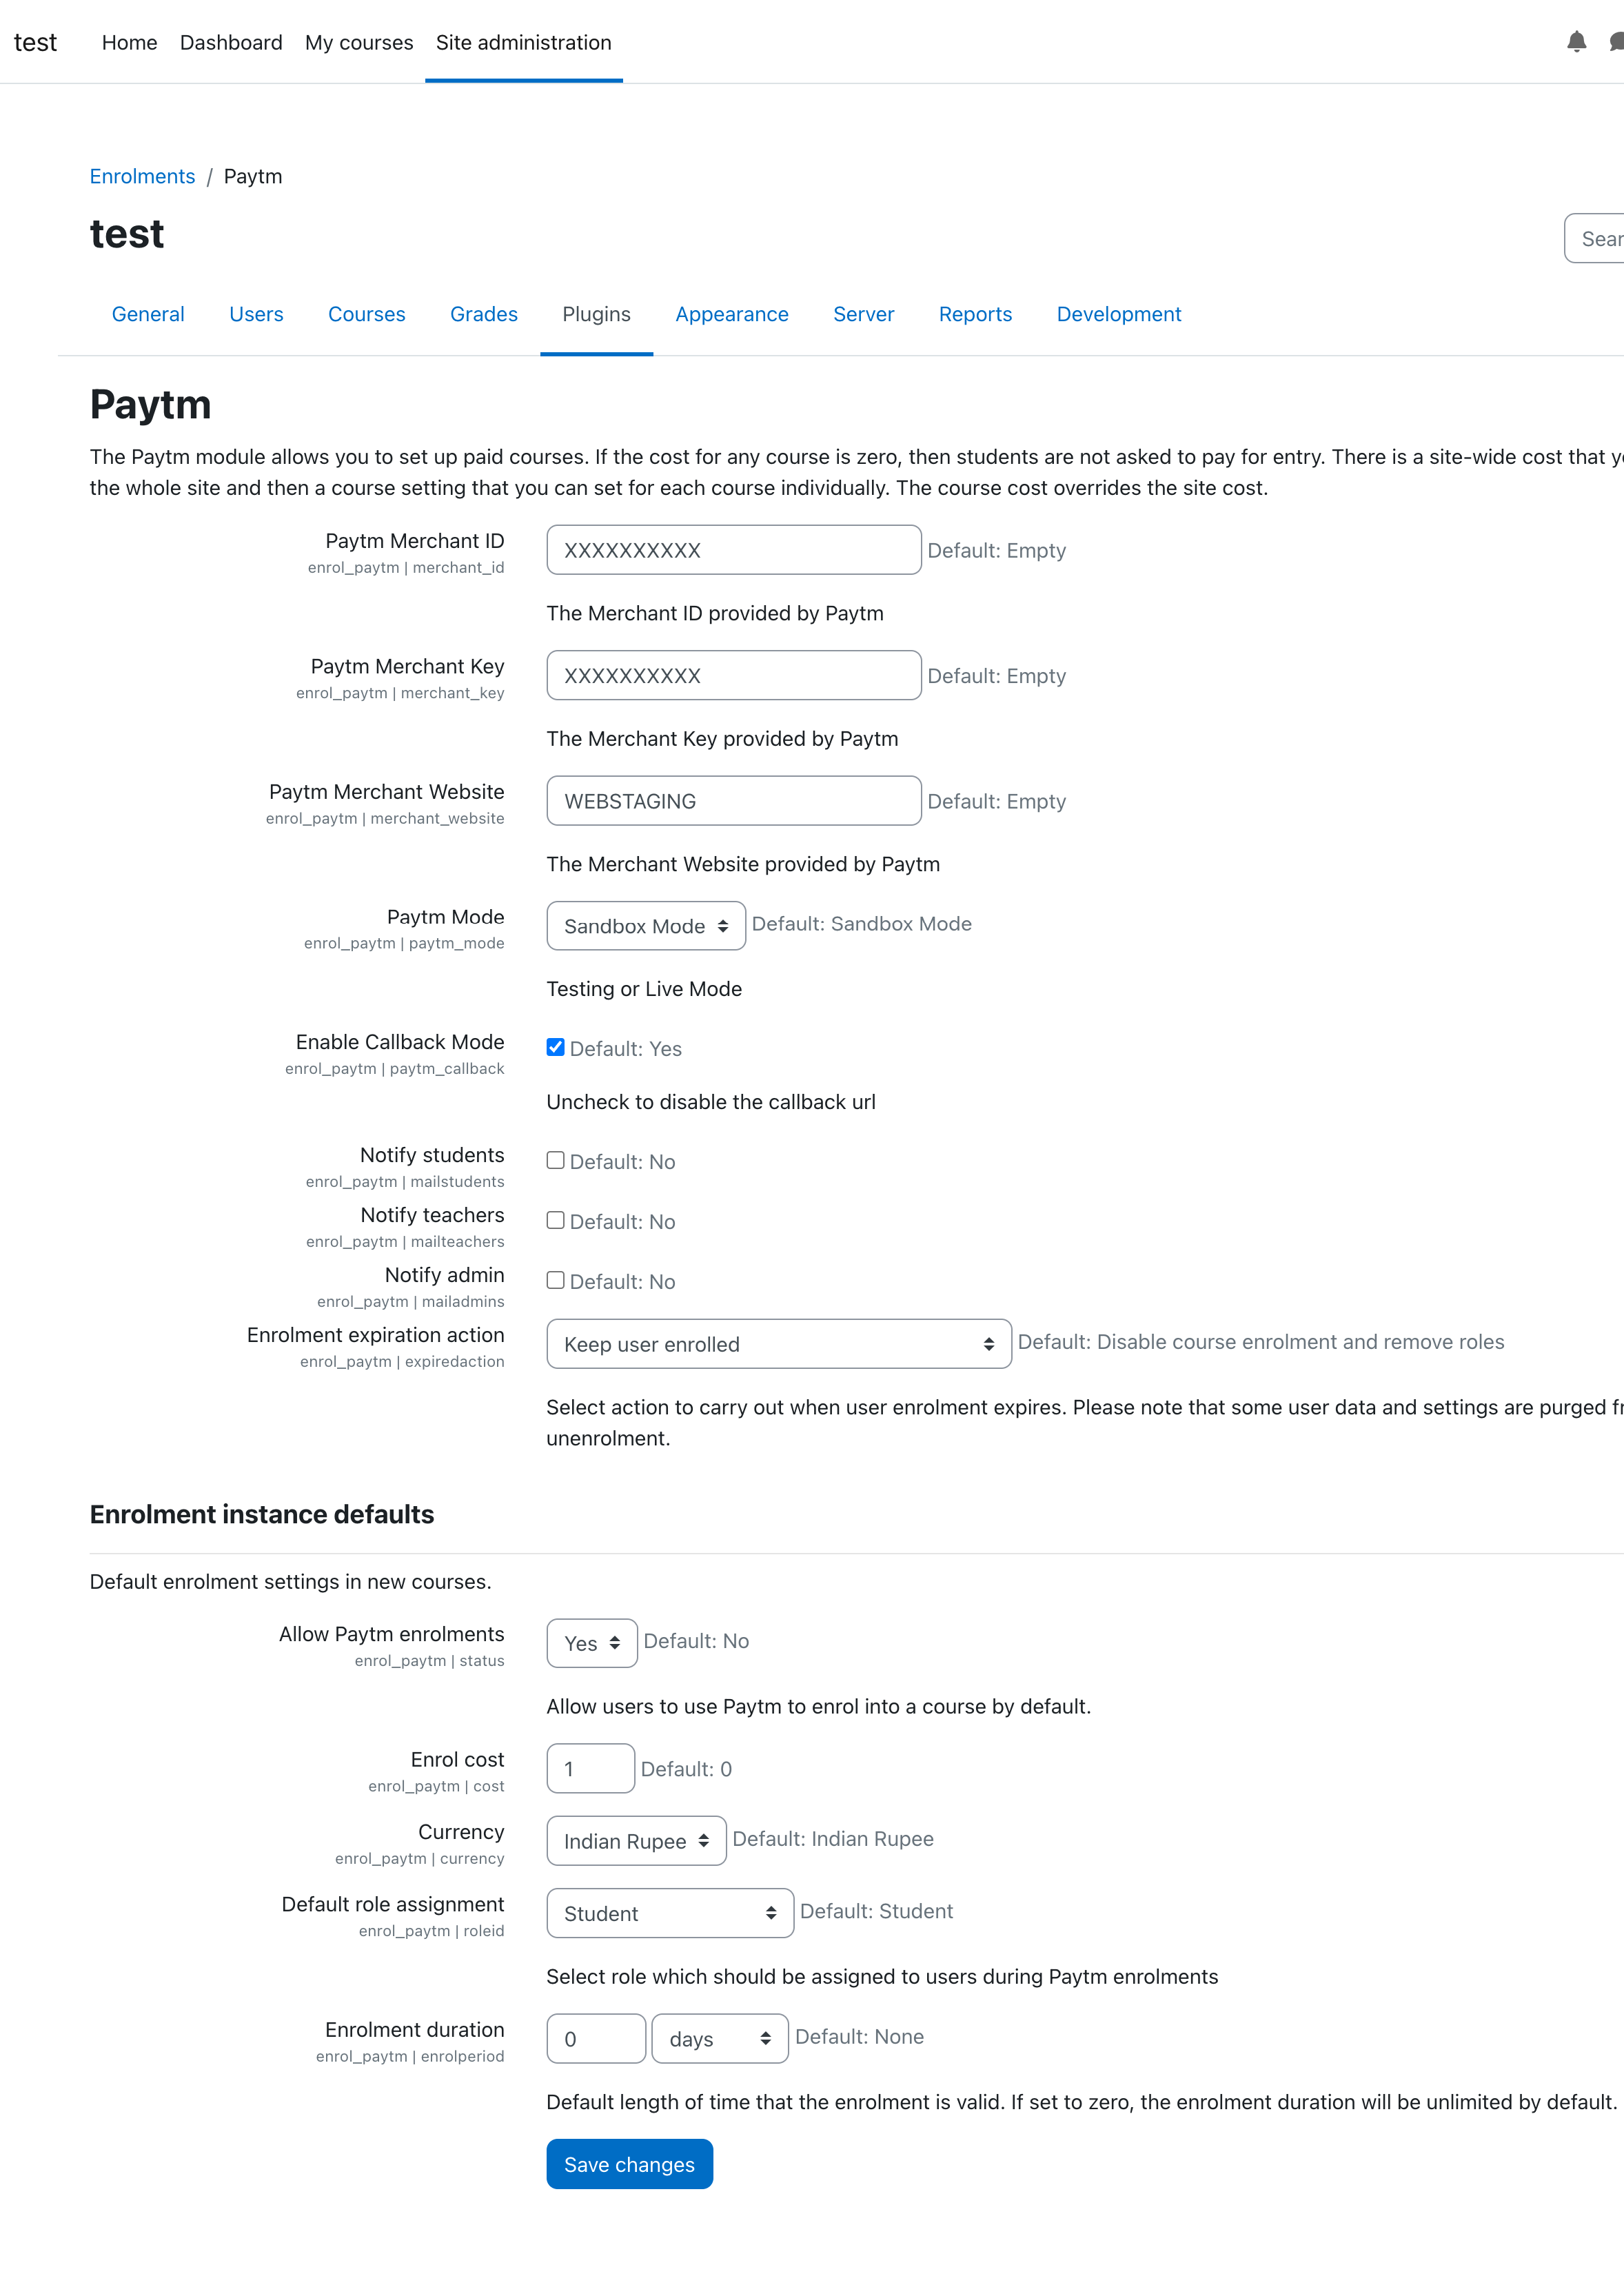
The New Settings- Paytm screen appears.

- Fill in the following merchant’s account information.
- Enable Paytm Order Module - Select either True or False to accept Paytm Order Payments
- Module Class Suffix - Provided by Joomla. Set it either to add a new CSS class or modify the existing CSS class for the div element for this specific module
Note: You can refer the Merchant Dashboard for the following parameters.

- Enter Merchant MID - Staging/Production MID
- Enter Merchant Key - Staging/Production Key
- Enter Merchant Website - Provided by Paytm
- Show Intro Text - Select, Yes or No
- Intro Text - Enter the description that you want to show as an introduction
- Currencies - INR
- Enter Callback URL - Select, Yes or No
- Show Amount Field - Select, Yes or No
- Amount Label - Enter Amount
- Amount - Enter the amount
- Show Title - To show or hide the title of the site
- Position - Select the position of your Paytm module on the Joomla site from the pull-down menu
- Status - Select Publish to publish the site
- Click Save Changes.
- To edit the merchant account details, go to Site Administrations > Plugins > Plugin Overview on the left navigation bar and select Setting next to Paytm to edit existing customers account details.
For any issues with the integration, refer to Get in touch.